
 See that picture above? That's the
 SLIP KNOT
The slip knot is the first step you have to do to crochet. It's a type of knot that is basically (this is how I remembered it) a knot around a loop. Once you learn how to make it, it's pretty easy, but for this tutorial I wanted to have plenty of pictures to make this knot as simple as possible to learn. So, without further a do, let's get started! :)
 I'll be using these abbreviations throughout this tutorial: A (the raw end) and B (yarn connected to yarn ball).
 Pretend your about to do a regular knot. You make a loop, with B on the bottom and A on top. Make sure there is a long end for A. Use picture as a guide.
 Pull A underneath the loop. Do not pull through loop, but pull across underneath.
 With your crochet hook, weave through the loop like so below:
 Your hook should be on top of the loop but underneath A. Use picture as a guide.
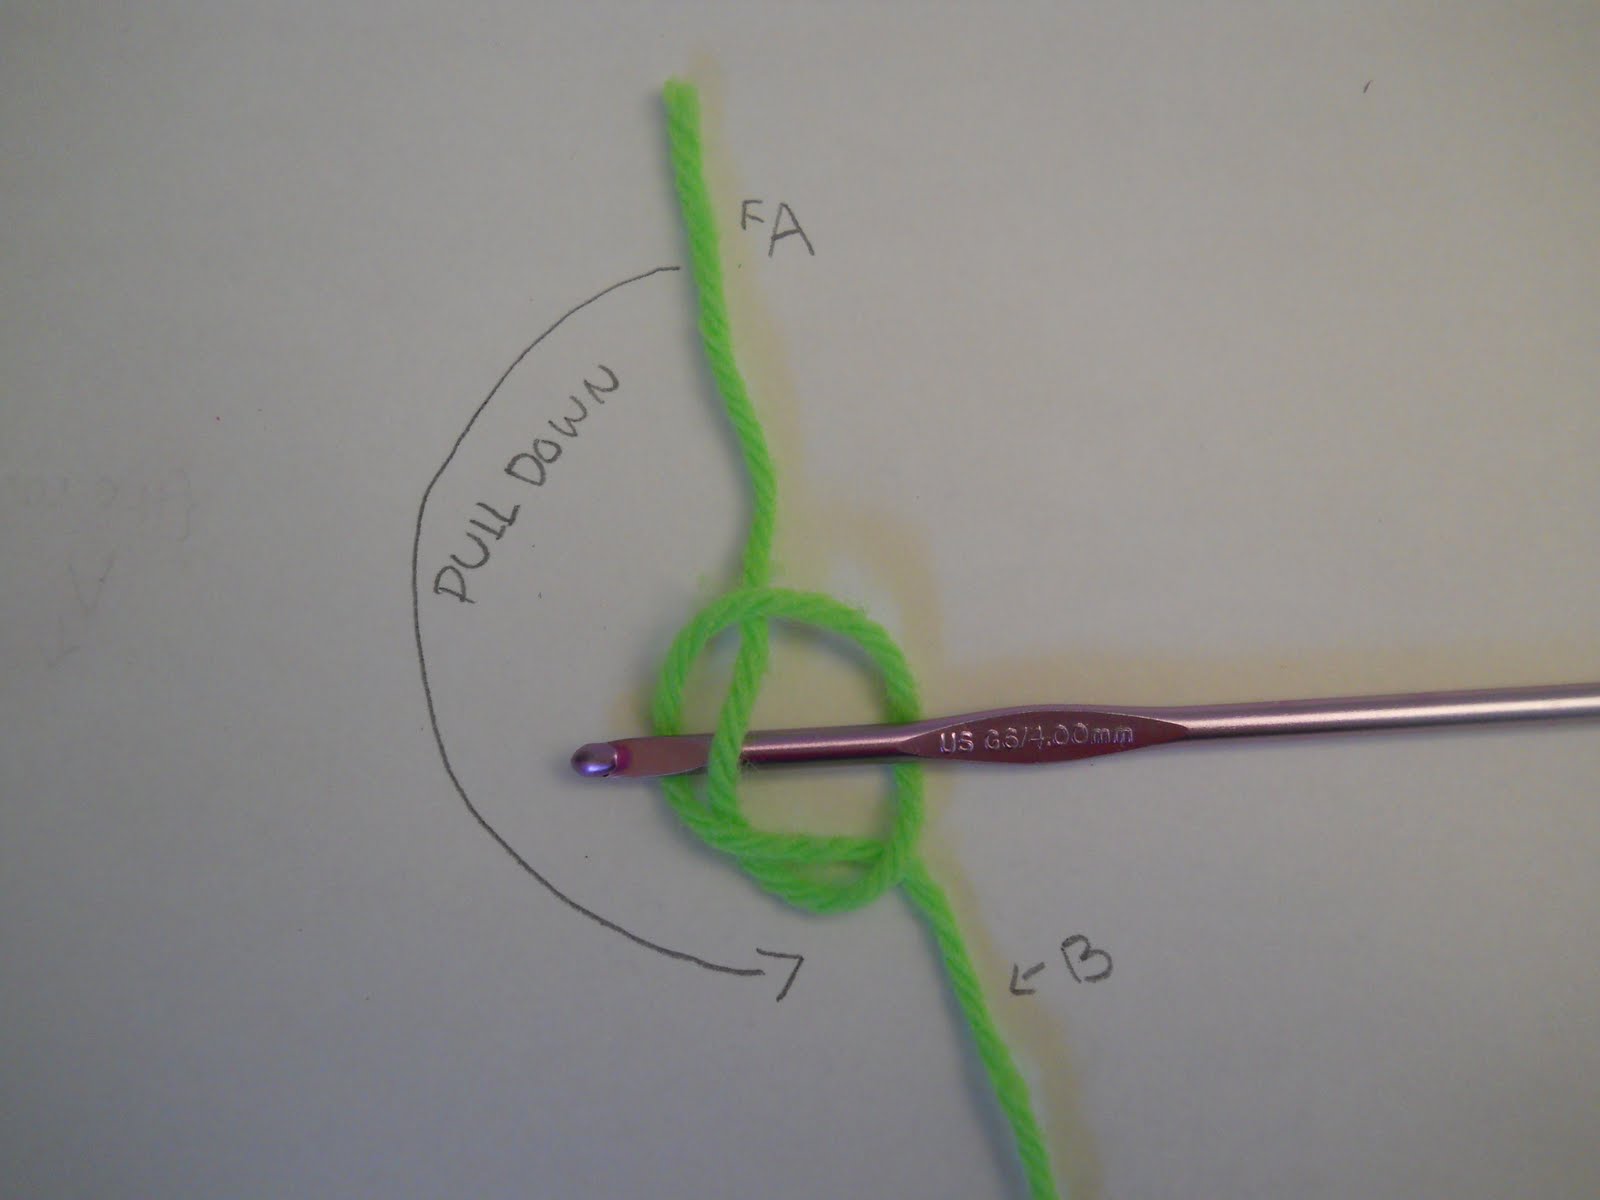 With A, pull down carefully to meet with B.
 Pinch them together and pull hook up.
 Now, it should look something like this.
 You're probably now thinking now, "This knot is HUGE! It doesn't look anything like the top picture!" But don't worry any longer, now we tighten it. To tighten it, pull B down and pull A up.
 And, voila!, the Slip Knot. It wasn't that bad, was it? I hope this tutorial was helpful, please let me know by commenting below. Soon, I'll be adding some more tutorials to the Crochet Dictionary section with the fun stuff, like the actual stitches. :) Sound fun? hee hee :) Have a crafty day! :)
-HappyHands
No comments:
Post a Comment
I love comments! Each and every one of them are read and are stared at for hours (I love them that much, yes). If you have a question, feel free to leave it here & I'll answer it as soon as possible.