Showing posts with label Sewing. Show all posts

Tuesday, October 11, 2011

fall leaves garland + pie n' the sky giveaway!

I finished my fall leaves garland. You like? :) I hung it up on a shelf that's over my desk. I love having this fall decoration in my room. So sweet! :)
It's really easy to make. All you need is some felt, yarn, and scissors. Now who doesn't love an easy project like this? I mean, come on! It can't get better than that. :) You can find this tutorial, here. :)
PLUS, there is an AWESOME 5-day giveaway happening over at Pie N' the Sky!
If you love giveaways, raise your hand.
My hand is raised, can you see it? :) he he

Today Melisa is offering a FREE. LARGE. SPONSER SPOT. for the month of November at the inspiring blog, The Wiegand's!
You can enter, here. :)
emma

Tuesday, July 26, 2011

Pentagon Fabric Ball

This was fun to sew-- a pentagon fabric ball using this tutorial from, and other silly things in the studio. It felt like a puzzle, sewing one side here and one side there until it was a ball. A lot of fun! :) Boys love them espechially, so they are great birthday gifts for younger boys.
Happy Sewing! :)
-HappyHands

Monday, July 25, 2011

Bunny Ring

I sewed up this cute bunny ring yesterday. I love how it turned out! :)
I had to also paint my nails to look like bunnies... hee hee :) I'm in a bunny mood. Can you tell? :)
-HappyHands

Saturday, July 23, 2011

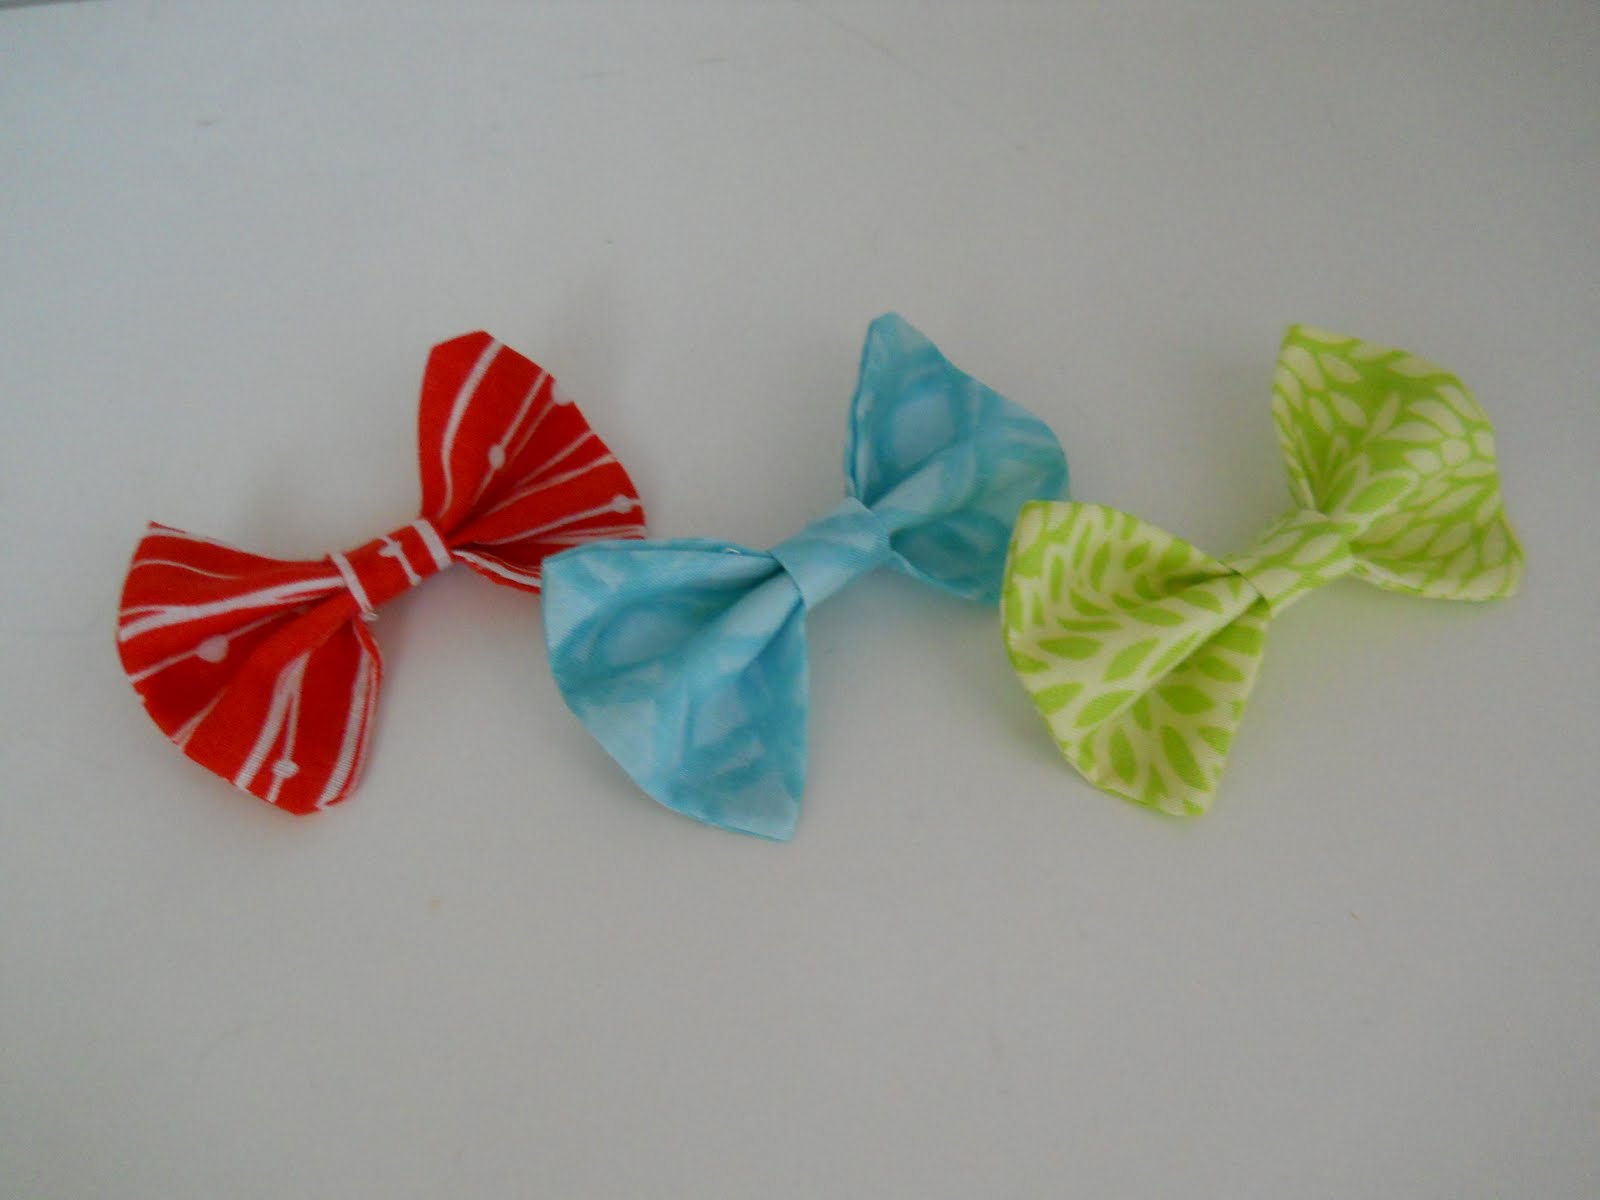
Cute Bows

I sewed some bows this morning using this tutorial from Pink Lemonade. Aren't they cute?
I'm still wondering what to do with them... I'm mainly thinking of attaching them to hair clips or a head band so I could wear them in my hair... Any ideas?
-HappyHands

Tuesday, July 12, 2011

Panda Bag

This is a purse I sewed using the pattern from the book, Arazni Cute Stuff, by Arazni Arozno. This purse is my new crochet bag. Whenever I have a crochet project I put in this bag so if I want to take the crochet project somewhere I just take the this bag with the materials and stuff inside and am ready to go. :) This bag also has it's little companion inside, the zipper pouch, I sewed as well to hold all of my crochet hooks.

Here's a closer look of the pocket on the front...
Well, I'm leaving from blogging again. Not as long this time though! I'll be back on Friday to continue this crafty adventure! :)
-HappyHands

Thursday, July 7, 2011

Zipper Pouch

First off, I want to say this: HI!!!! I'M BACK! :) Did you miss me? :) hee hee
Anyways, during the time I was gone I learned how to sew a zipper. I'm pretty proud of myself on how it turned out. I did a little quilting on the outside (which will be something good to bring out when I want to make my first quilt eventually) and I put batting in between two fabrics so it's cushy. :)
This zipper pouch is my new snazzy place where I keep my crochet hooks and stuff for my yarn-filled projects. :)
-HappyHands

Tuesday, June 21, 2011

Sewing Machine Cover

If you were over at SewTara yesterday you would have seen her awesome sewing machine cover. It inspired me so much I just had to make one of my own. Do you like it? :)
-HappyHands

Friday, June 17, 2011

Drawstring Coin Purse

I had way too many coins bulging out of my wallet so I wanted to make a coin purse of some sort to stick them in. So, I decided to make this cute drawstring coin purse. Like it? :) I've always loved drawstrings (like how you pull them open and closed so easily) so I knew I had to make my coin purse one! :) I picked out one of my favorite pieces of fabric and sewed one up. Coin problem solved. :)
-HappyHands

Saturday, June 11, 2011

My Felt Leaf Pillow

This is my Felt Leaf Pillow from the project designed by Aimee Ray. I really like how the leaves turned out, as of the flower I'm not as happy with; but, I think it still looks really cute. :) I was orginally hand sewing this project, but eventually lost patience by the third leaf (not much of a progress I must say). So I dropped this project for a few weeks until I finally realized that I could finish it using my sewing machine. Yes! :) So I brought this project back out yesterday and finished it. Woo hoo! :)
Want to make one of your own? Click here. Have a great crafty weekend! :)
-HappyHands

Friday, June 10, 2011

Needlebook tutorial

I've always wanted to make a needlebook. Didn't know how, just stared at other people's needlebook images on my favorite blogs for inspiration. Yesterday, I finally decided to sew one up and instead of keeping it to myself, I thought I would make this a tutorial. Before we get started, here's a little tour of this needlebook. :)
When you first open this book you come across a pocket holding a pair of scissors and a fabric marker, as well the first page holding a few pins.
Flip the page and you come across some needles. I know, I don't have very many right now on the second felt page, but I'm working on my collection. :)
And on the very last page is another pocket filled with my "in waiting to be winded on a spool" embroidery flosses. :)
Okey dokey, now here's the tutorial! :)
What you'll need:
  • Fabric (2 different fabric)
  • Felt (one large piece for inside page, and two optional tiny pieces of grey and tan)
  • Velcro (I used the sew on kind)
  • Optional: Embroidery floss (I used colors 3347 and 3712)
  • Nessary sewing tools

Cut two different pieces of fabric 27 centimeters wide and 18 centimeters long. Cut the pocket fabric 4" wide and 5 1/2" long; cut two. Cut the velco 1 1/2" long.
Hem the pocket fabric 1 1/2" in. Pin down. Repeat with second piece.
Folding a little bit of fabric underneath pocket fabric long sides, pin down 2" or more from side of inside needlebook piece of fabric (you will need this space for sewing down velcro as well sewing the needlebook together). Sew on the inside needlebook fabric. Do not sew bottom of pocket fabric pieces; they will close when done in later intstructions.
Next, pin down velcro on either side of inside needlebook fabric piece's edge. Pin down in the middle of edge's strip and sew.
Cut felt 17 centimeters wide and 19 centimeters long. Center on inside needlebook fabric piece, pin down, and sew down the middle.
Optional: Cut out a circle from a piece of tan felt and cut out a spool shape from grey\silver felt. Center felt spool on circle and use the satin stitch to embroider on top of it.
On the right side of needlebook cover fabric, pin down felt spool design, and use the running stitch and embroidery floss to sew down.
Pin felt page down towards the center of fabric so during sewing it will not get sewed down.
Pin the two needlebook pieces together, pretty sides facing each other. Mark an opening about 4" wide where you will flip out the fabric once sewed.
Sew together. During this process, the bottom of pockets will be closed.
Once finished sewing, snip the corners to get smooth edges. Be careful not to cut the stitching.
Turn inside out using the 4" opening. Unpin felt page.

Sew opening closed.
Iron.
You're done! :) Now sit back and admire your work. :)
-HappyHands
*FOR PERSONAL USE ONLY*

Wednesday, June 8, 2011

Sewing Machine Mat

I sewed a Sewing Machine Mat. I know, who would of thought? :) hee hee But I made one anyways and I really like it. It came out smaller than it was supposed to, so I was really bummed about that because there was supposed to be a velcro pincushion connected to it (you can never have enough pincushions, am I right? hee hee :). However, it's still a cute mat and a nice border to my sewing machine. Now when I want to move it out of the way to work on another project on my desk, I can just slide it to the side instead of trying to scoot it over as it rumbles loudly. :)
To make one of your own, head over to Carina's Craftblog (you can find the link in the 'Crafty Blogs' section) and go to her list\page\thingy section titled, Check Out the Tutorials! This section is kind of hidden so to look for it on the main page, it will be next to her Sponsers list and below her Catergories list. This project is labeled, Sewing machine mat with pincushion. :)
-HappyHands

Monday, June 6, 2011

My Tea Time Mug Rug

I don't know if all of you went over to Wild Olive or not during her late May tea party, but here is a project that I did from the tea party a few weeks ago. It's called the Tea Time Mug Rug. :) hee hee I love that name. :) Anyways, when I first saw it, I knew I had to make one of my own. I fell in love with the cute tea bag and I love the patchwork look. And, also, because I want to get back into sewing, I knew would be a great project to do! :)
To make one of your own, head over to The Split Stitch (you can find the link in the 'Crafty Blogs' section) and click on the page labeled, Turtorials & Patterns. From there, click on her, Sewing & Quilting section and you'll find this project, Tea Time Mug Rug, in there. Happy sewing! :)
-HappyHands

Saturday, June 4, 2011

Sewed Snack Bags

First off I want to say this, I SEWED SOMETHING!! Second off, well, now I'll start talking. :)
Yesterday, right after I finished publishing the post, "Where's the Progress?" I was mad at myself because I had not sewed anything still. So, since I was already on the computer, I remembered watching a tutorial by Angry Chicken on how to make these awesome snack bags. So, forcing no second thoughts on other projects, I zoomed over to her video turorial and watched it, and then sewed one myself. Once I finished my first, I was so excited that I sewed 4 more! :) hee hee
These snack bags are great because you can store just about any lunch food in there and as well they are a cute way to store your peanut butter and jelly sandwhiches in style. They each have a flap that is sewed into and folded over each snack bag. These snack bags are easy to make (that's why I made them. :) and fun to use!
To make one of your own, go over to Angry Chicken (you can find her link under the "Crafty Blogs" section), click on the button "please watch my video tutorials!", and then click on the video labeled, "easy snack bags with no velcro" . And there you have it, sewed snack bags. :)
-HappyHands
Related Posts Plugin for WordPress, Blogger...